Tag Archives: Almond

Pierre Herme Mango Tart with Coconut Cream

25 Feb

I had some time this week to flip through Pierre Herme’s recipe book “La Patisserie de Pierre Herme. He is known for creative yet delicious pastries. As I flipped through the pages, I stopped at the fruit tart w/ coconut cream and instantly fell in love.

dsc_0604

Coconut Cream
400 g butter
500 g confectioner’s sugar
200 g powdered almonds
300 g grated coconut
50 g custard powder
50 g dark rum
300 g light cream

Result: This is a delicious tart. Delicate and light, it carries hints of coconut. Definitely a keeper.

Christmas Chocolate Project- Caramelized Gianduja Hedgehogs-Curley

17 Dec

Brrrrrr it is freezing in Vancouver. The city has been hit with minus temperatures this week and to top it of more snow will be coming tonight and tomorrow. Yippee more snow to welcome the holiday season. With approx 1 week left to go, the city has gone into full swing with decorations and festivities. One of the rich traditions is the Gingerbread Town held at the Hyatt Regency in Vancouver. Every year participants create wonderful masterpieces and display them in the hotel.

gingerbread-houses

gingerbread-houses-2

During the holiday season, I tend to bake alot for friends and family. For the last couple of weeks or so, I have been flipping through recipes to see what I can make. Well I stopped at praline again. Nothing brings more joy to my heart than to see the perfectly coated glistening nuts. It makes my heart sing as friends and I munch on the sweet and crunchy morsel. A good accompaniment to chocolate. I decided to create caramelized parline hedgehogs.

To make the caralized Gianduja
First toast some nuts until golden. Note: do not over toast them as they will have a bitter taste. Then make the simple syrup by boiling the water with sugar. Once the sugar mixture comes to the rolling boil add the nuts and stir. Keep mixing. As the syrup boils the water will evaporate leaving the sugar coating the nuts. Eventually the water will boil off leaving the sugar crystals coating the nuts.

dsc_0559

It will look granular and coarse but not to worry, this is the process of making sugar coated nuts. Keep stirring and mixing until the left over sugar crystal caramelizes and have coated the nuts entirely. Remove from heat and spread out on silicone mat to cool.

dsc_0557

Once the praline has cooled a bit place into food processor to grind to a paste. In the beginning it will look like chopped nuts but eventually it will become a paste.

dsc_0558

Melt the milk chocolate and dark chocolate and add to mixture. Once the praline/chocolate has been mixed well. Pour onto silicone mould for setting.

To make the chocolates
First melt some milk chocolate, temper it and fill into chocolate hedgehog molds. Pipe the praline into the molds and set. Finally fill the chocolate.

Voila

dsc_0561

Caramelized Gianduja

150 g almonds lightly roasted
150 g hazelnuts lightly roasted
150 g caster sugar
50 ml water
150 bittersweet chcocolate
150 g milk chocolate

Results: This is a very good recipe for making hedgehogs. The praline although time consuming was excellent.

Happy Holidays!!!

Citron and Raspberry Mousse Cheesecake

5 Mar

I am back at making sweets again but I am also considering posting some savories on the blog as well. What is the reason you might ask? Well for one I don’t want to pass on an impression that sweets are my only diet. Nonetheless when I started this blog I began with the quest to master my baking and photography skills. Well needless to say, I think that I have come a long way in baking. My photography has improved as well as a few of my posts have graced the blogging community thankfully. Thus I am at an crossroads do I make more sweets? I really like baking and the creativity of it. When baking I am immersed in the world of flavours and colours and each creation is like peeling back a peel of onion revealing a bit more about the masterpiece. Each creation is on a journey with me through the years. I am grateful my blog has reached numerous parts of the world and the blogging community. Perhaps another blogging site for savories. Thank You All!!!!

Now to the main topic, I have been flipping through recipe books again. As I am Asian, I decided to make something with Asian influence or befitting the Asian palate. I bought a book titled Top Patissiers in Hong Kong. It is a pretty good book and the recipes are translated into english. Amongst those recipes I found a couple that I would like to try. The first project that I wanted to try is the Citron and Raspberry Mousse Cheesecake. Well… I am actually combining to recipes from two different HK chefs, nonetheless the flavours are same to the orginal recipe. The two chefs that inspired me was Titan Tsang and Tong Wong. What is so unique about this recipe is that it uses a lemon/lime curd to make the cheesecake.

To start off, I first made the dacquoise.
I then made the raspberry mousse
-measure the raspbery puree, sugar, cream cheese, whipped cream and gelatin
-soak the gelatin and warm up the puree
-add the sugar and gelatin in the puree
-mix the puree into the cream cheese
-fold in the whipped cream
To partially assemble, place the dacquoise disk into the bottom of the pan and pour in the mousse and set in the fridge.

The lemon curd mousse came next for the cheesecake.
-To make this curd, I measured the lemon and lime juice, sugar and eggs.
– boil the lemon juice and lime juice, take out heat, and mixed it on to the eggs and sugar.
-place back on heat and co cook to 85C stirring constantly and add the gelatin.
-Remove from heat and cool
-Mix the mixture with the cream cheese and fold in the whipped cream
-Pour on top of the raspberry layer

Voila!!!

DSC_0514

Citron Dacquoise
180 g egg White
90 g sugar
160 g ground Amond (toasted)
125 g icing sugar
30 g cake flour
20 g lemon zest

Citron Cheese Mousse
160 ml lemon juice
20 ml lime juice
40 g egg yolk
150 g sugar
300 g cream cheese
300 ml whipping cream
5 sheets of gelatin

Raspberry Cheese Mousse
100 g Raspberry Puree
50 g Sugar
150 g Cream Cheese
150 g Whipping Cream
6 g Gelatin

Result: This is a pretty cake as the pink raspberry mousse offsets the white lemon curd mousse. The cake has a pronounced flavor in lemon. Very tangy and perfect for lemon lovers.

Strawberries and Pistachioes-Pierre Herme

18 Jun

In light of recent events, I am making another dessert. This time I am making something from Pierre Herme again. A couple of years ago I bought his book on Pastries and have not regretted it since. The book was filled with stunningly beautiful photos of desserts and enough to make one salivate. Amongst the post it notes tagging recipes that I wanted to try was the Montebello. In his words it is the modern rendition of the Fraisier. The recipe was a combination of two of my favorite ingredients to use, pistachios and strawberries. It was composed of a dacquoise, pistachio mousseline and strawberries. Because my family is partial to all that buttery goodness, I am making a partial montebello. I am making the dacquoise and filling it with a creme patissiere.

To make the pistachio dacquoise, I toasted some almonds and pistachios after which I grounded them with a coffee grinder. Next I measured the dry ingredients and separated the eggs. I then measured the pistachio paste and left it to warm up. The icing sugar was sifted and combined with the almonds and pistachios. *Note: in the recipe, the ratio of almonds to pistachios 2:1 but because I preferred pistachios I changed the ratio to 1:1. Next I whipped up the egg whites and added in the sugar; whipping it till stiff peaks formed. Part of the egg white mixture, not alot, was used to soften the pistachio paste. Finally I folded in the icing sugar/nut mixture. Note: Fold until it is homogenous and you do not see the dry ingredients. Pipe into a 9 inch 3/4 inch deep ring and bake at 340F for 30 minutes.

DSC_0727

Once the dacquoise was baked and cooled, I poured the finish pastry onto it and decorated it with strawberries and pistachios.

DSC_0730

Montbello Pastchio Dacquoise (Adapted from Pierre Herme)

1/4 cup (25g) pistachios ( I toasted and grounded mine and altered the ratio to 1:1 Pistachios and Almonds)
1 1/8 cups (135g) Icing sugar (I used only 130 icing sugar)
1 1/4 cups (115 g) ground almonds
5 egg whites
1/4 cup (50 g) sugar
4 tsp (20g) pistachio paste
Extra Icing Sugar for sprinkling

Creme Patissiere

500 ml milk
100 g sugar
40 g Corn Starch
2 egg yolks
.5 piece vanilla bean

Result: It was delicious. The dacquoise was perfect, soft and crispy. It had a strong pistachio flavour and complimented the strawberries well. While it was a bit sweet, next time readers can adjust the icing sugar to 100 g instead to reduce the sweetness. I believe one the sweetness is reduce, the nuts would be more pronounced and work even better with strawberries. Pierre Herme definitely knows his flavours well!!!!

Green Tea Cakes-Curley

13 May

Baking time1!! I usually switch to seasonal fruits this time of year but despite the warm weather Vancouverites have been getting, the farms are not opned yet as the fruits aren’t optimal. As a result, I decided to make something that can be prepared anytime of the year. Intending to make something from Curley, I flipped through his book. The green tea cake captured me eyes. These are similar to financiers as it uses a beurre noisette or browned butter, almonds, and hazelnuts. Like mentioned the beurre noisette gives off a nutty and caramel scent when done properly.

To make the cakes, first brown the butter and cool it. While the butter is cooling, whip the eggs with the sugar until soft peaks form. Add the flour, nuts and matcha. Mix until smooth and then add the butter.  Rest in fridge for 15-30 minutes then use a pipping bag to pipe out into silicone moulds.

DSC_0500

Curley noted to leave the batter in the fridge for at least 30 minutes prior to baking. Bake at 350 for 20 minutes.

DSC_0502

Voila

DSC_0506

Green Tea Cakes
125 g unsalted butter
115 g egg whites approx 4 eggs
125 g sugar ( I used 100 g berry sugar)
115 g ground almonds
15 g hazelnuts ( I used coconut)
5 g matcha powder
40 g plain flour ( I use 60 g cake and pastry flour)

When baked, the cakes had a touch of sweetness and had a nice matcha taste coupled with hints of coconut. It is definitely a keeper. As an alternative one can add/sprinkle black and white sesame on top for crunch.

Green Tea and Azuki Bean Mousse- Curley

20 Sep

Yippee!!! Its still warm and sunny. My corn patch was finally flourishing and filled with baby corns. Nothing was sweeter than to see your own creation blossoming in the warm summer sky. To make it sweeter, my order for a baking book came. I immediately flipped through the pages and stopped on the green tea azuki mousse cake. I had always wanted to learn to make a green tea azuki mousse cake so now was the best time ever 🙂

I first made the cake and then worked on the filling. The azuki mousse came first. Blossom the gelatin in cold water and whipped the cream first. Warm up the azuki paste so it became spreadable or easily whipped up. By the time the azuki cream warmed up, add the blossomed gelatin. Cool the mixture prior to adding the whipped cream as you want the mixture smooth not grainy in appearance. Once the azuki mixture/cream mixture is smooth and incorporated, spoon the mixture into silicon mould.

DSC_0545

The green tea mouse came next. The methodology was similar to a custard when incorporating in the ingredients. Though similar, let the tea and the cream steep for approx 1 hour first

Keys

Separate the eggs and egg white
Combine the matcha and water. Keep mixing the matcha powder with the water until paste like. Lumps are very unappealing.
Have the chocolate in a bowl and keep aside until the custard is ready. Pour hot custard to the white chocolate. Cool set aside.
Use this time to whip up the cream and then fold in the cooled custard

DSC_0547

DSC_0550

Assembly:
1. Place the cake at the bottom
2. Pipe in the mousse
3. Add a layer of cake on top of the mousse
4. Spread the Azuki/red been paste
5. Place the azuki mousse on top.
6. Pipe the mousse to the top and cool in fridge prior to making the glaze.

DSC_0552

7. When the cake has coolded sufficiently, pour the glaze over the mousse cake and decorate lightly.

DSC_0567

Green Tea Mousse(adapted from William Curley)

290 ml whip cream
10 g green tea leaves
155 white chocolate
3g match powder (Could be 3-5 depending if you want a strong matcha taste
5 ml water
3 g gelatin
35 g egg yolks
10g caster sugar.***

***35 egg yolks, 10 caster sugar used to make the sugar/yolk mixture light in colour.

I found this cake superb especially the fact it had red bean mousse in it. It was quite light as the green tea mousse toned down the sweetness. While it may be taxing on time, the results are delicious. A keeper to whom loves matcha tea and red bean dessert. Bon Appetit.

White Chocolate and Almond Truffles

12 Sep

Summer is almost gone as the evenings are cooler and the sun sets at an earlier time. I am back from basking in the sun. Looking at my book pile, I finally realized that I have collected a huge pile of them. As I flipped the pages of recipes, I landed on the White Chocolate and Almond truffles by Will Torrent. As I was making them I realize the recipe called for butter. In the beginning I did not realize butter’s part in the recipe, then the obvious came out at me. The added butter increases the smoothness of the chocolate.

When baking or making with chocolate, do not put water in the ganache as it will seize up and nothing can be done with it. Making sure of that tip, I went ahead in making the ganache. Once they are all piped, I let them chill. While the middle was chilling, nuts were toasted and grounded. They were the coating for the chocolate. Making sure the almonds were toasted to the right level, I then took out the chilled ganache and dipped them in the tempered white chocolate and almond for decoration.

DSC_0537

White Chocolate and Almond Truffles (Adapted from Will Torrent)

100 ml/scant 1/2 cup whipping cream
2 tbsp butter
a pinch of salt
550 g white chocolate chopped
250 g almonds

DSC_0541

Result these were the best truffles I tasted; they were extraordinary. The texture was smooth and to be enhanced by the toasted almonds… wowwww. I am surely going to be keeping this for either birthdays or holidays. Enjoy the rest of the weekend.

Pear and Chestnut Financiers

15 Dec

Christmas baking was now in full swing. I already had a baking list to do and am continually adding projects onto it. The latest addition to the list was Chestnut financiers. Beaucoup Bakery recently promoted a chesnut financier made with chestnut honey. This served as motivation for me to bake some financiers as well. Traditional financiers often use ground almonds or hazelnuts, as I loved chestnuts, I included some toasted ground chestnuts into the mix. Pears were also added for a lovely light flavour. 🙂

To make the financiers, butter was first browned. Next I measured the icing sugar, flour, egg whites, almond and chestnut. The egg whites were beaten to foamy soft peak. When the whites were at soft peak stage, add in the sifted flour and icing sugar. Incoporate the ground almonds and chesnuts next. Lastly add in the browned butter. To assemble the financiers, scoop the batter into silicone molds and alternate with batter, pear and chestnut puree. Bake at 335F for approx 25 minutes until one could see the financiers puff up.

DSC_0254

DSC_0258

Pear and Chestnut Financiers

120 g butter
4 large egg whites
80 g plain flour
80 g icing sugar
100 g ( 50 g almond meal and 50 g toasted ground chestnut)
25 g chestnut puree
approx 40 g pear

Results: I found the texture quite nice. The pear complimented the lightness in taste and the puree boosted the chestnut flavour of the financier. My only regret was the number of stairs I need to climb daily to burn off this excess calorie intake. Ohhh well, its Christmas and the holidays.

Let the baking and holiday cheer begin !!!!

Joy of Halloween and Apple Tarts!!!

27 Oct

Trick or Treat,
Smell my feet,
Give me something good to eat,
If you don’t, I don’t care,
I’ll pull down your underwear!!!
Photo-0182

Ahhh…. the old childhood song and rhyme to celebrate Jack O Lantern time. Nothing says fall like Halloween. Houses in the neighbourhood are decorating with hues of golden yellow, orange and black. Corner to corner, say hi to Mr and Ms. Pumpkins, Witch, Jack o lantern and Bones. A toothy grin came across my face as the sight of these decorations bring back memories of smiling little kids racing up and down the street in their costumes. Music rings my ear and warms my heart when I hear the pitter patter of little feet and fists knocking on doors saying the magical words. The neighbourhood comes alive with glowing jack-o-lanterns and fire works. In quest to make this years Halloween memorable I decided to buy some decorations and am waiting for the day to arrive in anticipation 🙂Its-the-Great-Pumpkin-Charlie-Brown-1
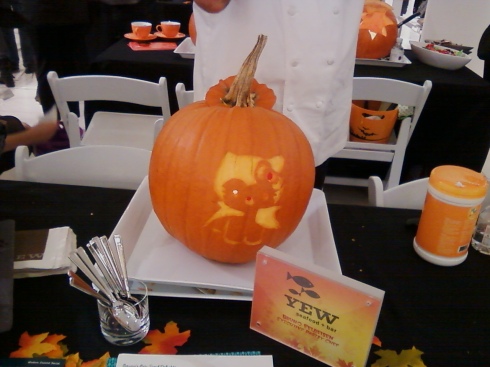
The Halloween spirit really is infectious but in a good way. Throughout the city, one could see decorations of Mr. Jack O Lantern. Staff at department stores are even enjoying this spirit as they are out in costumes. At any rate, Halloween certainly is gainly popularity…yippee for the candy lovers and pumpkin carvers. This weekend was entertaining as chefs around town competed in a Jack O Lantern competition. Let the photos be the words.

Photo-0188

Photo-0180

Photo-0186

Photo-0183

Photo-0191

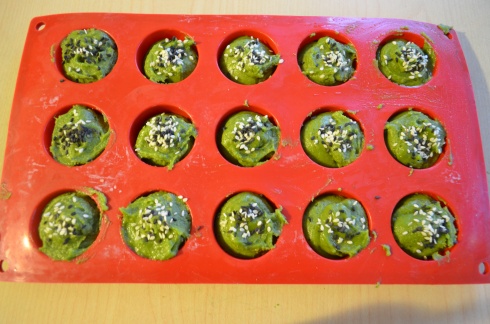
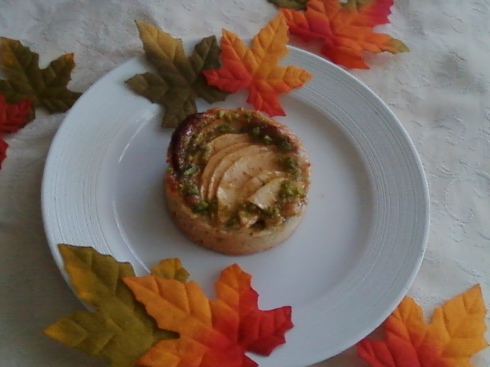
Jack O Lanterned out? Never….there is more from where that came from stay tuned…but now for some goodies. Nothing says more like Fall than Apples. Crisp, sweet, crunchy and juicy, Apples are at the top of its game. Inevitably, I lost out to my baking itch 😛 This time, I made some apple tart with creme d’almonde. Enamored by tart shells, I wondered as to how to improve my pate sucre. It was very good, but I recently tried one that was even better. Christophe Felder to the rescue. I finally found a pate sucre that was equivalent to the pastry shop. The secret was using icing sugar instead of granulated sugar. Icing sugar tend to be more light hence resulted in a lighter pastry.

Felder suggested beating the sugar and butter together, a cookie dough method, but I chose to combine the butter and flour together first, biscuit method. The pastry dough would be lighter. As for the creme d’amande, I combined freshly toasted ground almonds and pistachios together. Apples were the centre piece. As a note to readers, don’t omit the jam. The jam acted as a barrier to the tart dough and creme almond ensuring a light pastry when baking. Bake at 360F approx 30 minutes.

Photo-0153

Photo-0154

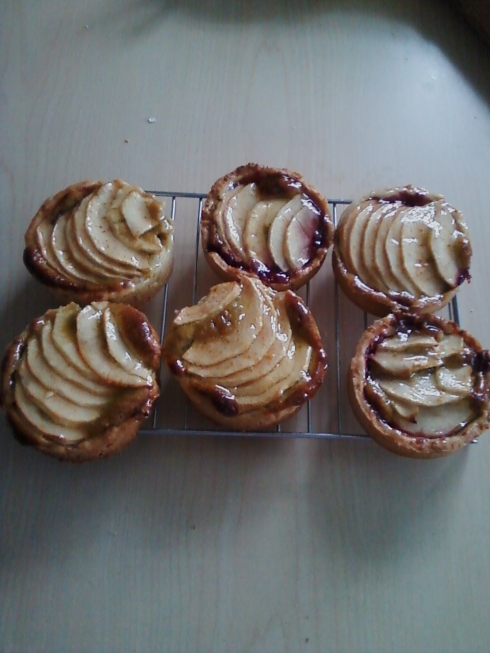
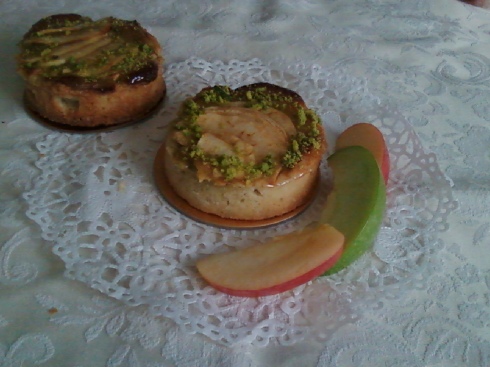
Once done, I glazed the tarts and topped them with ground pistachios.

Photo-0164

Photo-0194

Photo-0159

Pate Sucree Christope Felder (adapted)

1 stick butter
2/3 cup confectioner’s sugar (icing sugar)
1 vanilla bean
3 tbsp-25 g ground almonds ( I used approx 50g almonds and pistachios)
1 pinch salt
1 egg
1 2/3 cups (200 g) all purpose flour.

The recipe was a keeper. A fine tart it was as it had a light and crispy crust along with a fragrant nutty interior that complimented the apples.

Happy Halloween All !!!!

An Eventful Weekend and Chinese Favorite Dessert

1 Oct

This was one of the better weekends I had in this month apart from the miserable weather. I won tickets to VSO’s opening courtesy of News 1130. What a treat, as we were seated in the centre section. This year marked VSO’s 95th Anniversary. No words could describe the beauty of the Orpheum. Inspired by European Opera Houses, the interior was a marvel. From the rich red carpeting to the beautifully brightly lit chandeliers and intricately detailed ceiling, it represented passion, grandeur and refinement; traits one sees in Europe. If you listen even more closely, one might even hear Beethoven, Mozart’s music resonate. :). The highlights were by Dame Evelyn Glennie who gave a spectacular performance and my favorite Bolero. I could literally feel my heart beat to Bolero from the softer beginning to a powerful finale. Everyone who attended was awe stricken and VSO received a standing ovation to a much deserved performance.

DSC_0210

Besides going to the VSO this weekend, I also ventured to Science World. Like a girl scout undeterred by mother nature, I braved the weekend’s nasty combination of torrential down poor and wind in order to attend the exhibits. Science World had free admission all weekend. Guess what that means? Yup, long line ups of eager awaiting kiddies and their families. First stop DINOSAURS….why…hello there, Mr. Rex and Pterodactyl. Mouths agape, everyone was in awe as evident by the flashing cameras. Giddy as school children, adults were eagerly taking a photo with their new found buddy, Mr. Rex. Dino exhibit definitely hit the spot for me.

The Jenga exhibit was another crowd pleaser as it showcased Architecture. Individuals of all ages raced around their creations while carefully laying down each piece to build a masterpiece. Imagine their glee when the jenga pieces started to wobble and well…you know what came next….CRASH heheheh. Here are the photos of the exhibits.

Photo-0112

Photo-0114

Photo-0117

Photo-0120

Photo-0121

Finally… nothing could be better than a nice warm dessert. I reverted back to my favorite, Black Sesame Pudding. A classical dessert that never looses its appeal to Asians, it was actually delicious and nutritious too :). The mighty black sesame packs a powerful punch in minerals, such as zinc, magnesium, copper, vitamins and antioxidants. Instead of the store bought instant mixes, I decided to make it the traditional way. Say hello to Mr. Blender.

The key to making a smooth Black Sesame Pudding was making sure that the rice was soaked thoroughly first. Similar to cornstarch, the rice serves as a thickening agent. For a strong toastier taste, toast the black sesames and finely grind them. Almonds were also a tasty addition so soften some too.

DSC_0208

Methodology: Blend the almond and water until you get a smooth consistency. Then add the ground sesames, again making sure the mixture was granule free. Incorporate the rice last. Boil about 4-5 cups of water and gradually add in the sesame/almond/rice mixture. Stir continuously until smooth and break any occuring lumps. As the mixture thickens add in enough sugar for sweetening.

DSC_0209

Enjoy!!!